Wednesday, December 30, 2009

Activity: Veg-Tea-Ble Party!

Instead of having a traditional tea party, invite your students to a Veg-tea-ble Party. Have students taste various fruits and vegetables or sample microgreens from your microfarm instead of snacking on cookies and crumpets.

You can set up the tables as you would a regular tea party. Invite students to get dressed up and bring a “guest” stuffed animal or toy. Make the Veg-tea-ble Party something special and out of the ordinary so that kids get excited about trying something new.

Encourage kids to try each fruit and vegetable. Remind them that they don’t have to like everything but they should at least taste it. Also remind students to be polite and not say “yuck” or other negative comments about the food. Tell them that the “chef” has worked hard to make these fruits and vegetables. Limiting the number of “yucks” also prevents students from discouraging each other from trying foods.

If you host your own Veg-tea-ble Party, we would love for you to share stories and your experiences!

Cheers!

Tuesday, December 22, 2009

Monday, December 21, 2009

Activity: Veggie Stamp Holiday Cards

Instead of using store bought holiday cards, consider having students make their own unique cards using fruits and vegetables.

Materials:
  • Paper
  • Tempera paints
  • Paper plates
  • Paint brushes
  • Knife
  • Various fruits and vegetables, such as potatoes, cucumbers, star fruit, apples, mushrooms, carrots, or broccoli.

Activity:

  1. Cut fruits and vegetables into manageable sizes for kids to use as stamps. If you're feeling creative, try carving shapes, such as stars, hearts or letters, out of the potatoes or other fruits and vegetables.

  2. Put tempera paint onto paper plates for each student.

  3. Instruct students to use the paint brushes to apply paint to the fruits and vegetables and then stamp them onto paper. Students can create collages or try to create a holiday scene for a holiday card.

  4. Don't forget to remind students to not snack on their stamps. ;)

  5. Let their artwork dry and then proudly display their work around the classroom or give as gifts!

(photo from http://whipup.net/2006/09/18/veggie-prints/)

Friday, December 11, 2009

Article: "A Kids-Eye View of White House Gardening"

I came across this article online. http://www.dcfoodforall.com/content/kids-eye-view-white-house-gardening

It features an interview with two 5th graders from Bancroft Elementary who are helping with the White House garden.

The interview illustrates the profound impact that gardening has on the students. The students also discuss school lunches and their desire for healthier foods.

Excellent article and great motivation to start a school garden!

Tuesday, December 8, 2009

Gardening and History

A garden provides a wonderful opportunity to discuss American history with your students.

Did you know that Thomas Jefferson grew 250 varieties of more than 70 different species of vegetables
? In fact, if you visit the Thomas Jefferson Foundation website, you can purchase some of Jefferson's seeds, for the low, low price of $2.50 per packet. Don't forget to search by the correct gardening zone--zones 3, 4, or 5 for those fellow Wisconsin gardeners out there.

Did you know that Michelle Obama did not start the first garden at the White House
? Vegetable gardens at the White House date back to Thomas Jefferson, Quincy Adams, all the way through Abraham Lincoln. Eleanor Roosevelt revived the garden during World War II to show her support for the Civilian Defense Program and to encourage citizens to start their own gardens. (More info here).

Did you know that Native
Americans introduced the pilgrims to potatoes, beans, peppers, tomatoes, and squash; while the pilgrims introduced the Native Americans to carrots, wheat, rice, oranges, and wine grapes?

For some more historical connections, go here.

The connections are really endless. Why not focus an entire unit on the historical significance of gardening in the US? You can have students research prominent gardening figures, such as Jefferson, Eleanor Roosevelt, or George Washington Carver, among others. You can discuss how gardening and agricultural practices have changed throughout history, especially in regards to the industrial revolution. Or you can research the history of how certain fruits and vegetables arrived in the United States.

Have you done a history lesson on gardens? I would love to hear what you did and how it worked! Leave your comments below!

Friday, December 4, 2009

"Grab and Go" Gardening Related Worksheets

Looking for some easy "Grab and Go" gardening-related worksheets for your students?

Visit the "Teaching Tools" section of http://www.gotdirtwisconsin.org for some new, quick and easy worksheets, including:
  • A-Maze-ing Plant Parts
  • Food Find
  • Word Scramble

Do you have suggestions for more "Grab and Go" worksheets or activities? What types of worksheets or activities would you like to see? Let us know!

Wednesday, December 2, 2009

Activity: How does your garden grow?

This sequencing activity allows children to imagine being a farmer or gardener. Children will practice following directions, putting items into a sequence or particular order, and using basic addition and subtraction.


Materials:
Worksheet containing images of four tomatoes, four ears of corn, four heads of lettuce and four carrots
Brown construction paper
Coloring supplies
Scissors

Activity:
  1. Give each student the vegetable worksheet, one piece of brown construction paper, coloring supplies and scissors.

  2. Have students color and cut out the pictures of the vegetables. Make sure that students color in the vegetables the appropriate colors.

  3. Explain to students that we will now plant our garden but we have to follow very specific instructions to make sure that everything grows.

  4. Tell students that the piece of brown construction paper is their garden. The side of the paper closest to them is the front of the garden and the edge of the paper that is furthest away from them is the back of the garden. (It may be useful to demonstrate this to students to avoid confusion)

  5. As you read each example to the class, have students arrange their vegetables in their garden. Tell students that they may need to rearrange or change their vegetables as each clue is given. Read each example two or three times so that students can check their work. You may need to do the first example together so students get an idea of what they are supposed to do.

    EXAMPLE ONE:
    The tomatoes get planted in the front row of the garden.
    The lettuce gets planted in a row behind the tomatoes.
    The corn gets planted in a row in front of the lettuce.
    The carrots get planted in the back row of the garden.


    EXAMPLE TWO:
    The corn gets planted in the front row of the garden.
    The tomatoes get planted in the back row of the garden.
    The lettuce gets planted in a row right behind the corn.
    The carrots get planted where you think they should go.


    EXAMPLE THREE:
    The yellow vegetable gets planted the back row of the garden.
    The red vegetable gets planted in a row right in front of the yellow vegetable.
    The green vegetable gets planted in the front row.
    The orange vegetable gets planted where you think it should go.


    EXAMPLE FOUR:
    The yellow vegetable gets planted in a row in the middle of the garden.
    The red vegetable gets planted in a row in front of the yellow vegetable.
    The green vegetable gets planted in the back row of the garden.
    The orange vegetable gets planted in the front row of the garden.


  6. After reading each example, review it together and show the correct arrangement of vegetables.

  7. After completing each example or after doing all of the examples, students will now "harvest" their vegetables. Read each "recipe" below and have students remove the appropriate number of vegetables from the garden and place them in an imaginary basket. You can follow up by asking students how many vegetables are left in the garden or row, how many vegetables did they pick from the garden, etc.

    RECIPE 1:
    Two heads of lettuce
    Three ears of corn
    One tomato
    One carrot

    RECIPE 2:
    Three ears of corn
    Four carrots
    Two heads of lettuce

    RECIPE 3:
    Two tomatoes
    Three carrots
    All of the lettuce
    One ear of corn

    RECIPE 4:
    One head of lettuce
    One tomato
    Two carrots
    Two ears of corn


Activity adapted from AIMS Education Foundation's "The McGregors' Garden" Activity

Tuesday, November 24, 2009

Activity: Estimating Tomato Seeds

Fresh fruits and vegetables can be excellent tools to teach basic math skills. In this activity, students will practice estimating, comparing and contrasting, and doing basic addition and subtraction.

Materials:

Cherry tomatoes (enough so each student gets ½ of a tomato)
Paper towels/napkins
Paper and pencils
One large tomato
A knife to cut food in half ahead of time

Activity:

  1. Explain to the students that today we are going to guess or estimate the number of seeds inside of a fruit or vegetable.

  2. Hand out ½ of a cherry tomato and paper towel/napkin to each student. Make sure that the students do not eat the tomato before completing the exercise.*

  3. Without actually counting the number of seeds, have students guess how many seeds are in their tomato half. Have them record the number on a piece of paper.

  4. Instruct students to count the seeds in their tomato.

  5. Have students record the actual number and figure out how close they were to their guess, allowing them to practice subtraction. Find out who was the closest.

  6. Have students compare the number of seeds in their tomato with a partner. Who has more seeds? How many seeds do they have all together?

  7. As a class, calculate the total number of seeds from all of the tomato halves. You can also calculate how many seeds one half of the room has compared to the other, how many seeds the girls had compared to the boys, etc. Each time students can either calculate the totals together as a class or do the addition on their own and then together as a class.

  8. Now ask students to guess how many seeds are in one large tomato. Record answers on the board or chart paper.

  9. Have students count the number of seeds in the tomato.

  10. Compare the number of seeds in the large tomato to the number of seeds in the cherry tomato halves and to the classes’ total number of cherry tomato seeds. Which has more?

Extension:

  • Do the same activity with a different fruit/vegetable (ex: pumpkins, apples, peppers, watermelon, etc.)

  • Have students calculate the mean (average), median (middle number), and mode (most frequent number) for the classes’ cherry tomato seeds
Note: Although student could eat their tomato halves, they probably shouldn’t since they will be playing with them and counting the number of seeds. It is probably best to advise your students that although tomatoes are a yummy snack, it is best that we don’t eat them after playing with them.

Monday, November 16, 2009

Grant Opportunity: Welch's Harvest Grant

Welch's and Scholastic will award two schools in every state with a customized indoor or outdoor garden package to teach children about nutrition and sustainable agriculture.

The awards are open to K-8 classrooms with a minimum of 15 students. The top five winners will receive a package valued at $1,000, the top 25 winners will receive a package valued at $500, and 70 winners will receive a package valued at $250. According to Welch's website, the award package includes garden tools, seeds and educational materials.

Remember that the White House's garden cost less than $200 to create. So no matter what, if you receive an award, you'll have enough to start a garden!

Applications must be submitted by February 6, 2010. Visit Welch's website for an application and additional information.

Friday, November 13, 2009

Students Write about their Microfarm

Students from Woodland Elementary School in Barron, WI have also been busy planting and harvesting a microfarm. Check out these adorable letters from the students describing their experiences.

Dear Mr. Wright,
Our class Micro Farm went great. We all loved watching
it grow. When they were finished growing, we got to eat them. My
favorite ones were the purple kohlrabis and the carrots. The one I did not like was the sunflowers. I got to plant the purple kohlrabis. I loved planting the purple kohlrabis. Thank you for inventing the Micro Farm.
Love,
Mackenzie


Dear Mr. Wright,
My class Micro Farm is going very well. We are harvesting around Oct. 21. We have purple kohlrabi, tenber green mustard, carrots, and sunflowers. One of the carrots was a foot taller then the other. The carrots were the last ones starting to grow. I can not wait until we harvest them. Thank you for giving us the farm.
Your friend,
Grace


Dear Mr. Wright,
Thank you for the micro-farm. It was fun watching the plant’s grow. My favorite was the purple kohlrabi. The sunflowers tasted funny. The tendergreen mustard and carrots tasted funny. It was fun to harvest the greens. I planted the sunflower. I planted the sunflowers with Walter and Kambria. We had it with ranch dressing.
Your friend,
Kiara

Tuesday, November 10, 2009

Sampling the first microfarm harvest

Last night, I tried the first of the microgreens from the microfarm.

I decided to first taste each microgreen individually, which I am told is similar to how teachers have their students sample the microgreens. Plus, I figured that before I took a leap of faith and incorporated them into a salad, I would first see how they tasted by themselves.

Again, I must admit, I was nervous about trying the microgreens. They bear a strong resemblance to grass clippings. Plus, I've never considered eating sunflowers or hybrid popcorn before, so I was completely clueless how there would taste.

First up: Sunflowers. After a slight hesitation, down the hatch it went. I was pleasantly surprised. The sunflowers tasted similar to other salad greens and reminded me of something I might get in a restaurant.

Not too bad!

Next up: Hybrid popcorn. I must admit, I did not like the hybrid popcorn as much as the sunflowers. I thought that something about the texture and almost chewiness of the hybrid popcorn was not appealing. However, that does not mean I will totally give up on it. I plan on incorporating them into a salad. Although I may not like how they taste on their own, they may work well when mixed in a salad with other greens.

So my microfarm journey continues. I'm looking forward to harvesting the carrots since I am told the greens taste just like regular carrots!

Monday, November 9, 2009

The first harvest from the microfarm

After planting my first microfarm less than two weeks ago, it is time to start harvesting!

The sunflowers and hybrid popcorn were the first microgreens harvested.

Harvesting was incredibly easy and a lot of fun. It was like giving my microgreens a haircut. Using a pair of scissors, I trimmed the tops of the plants, leaving a small shoot behind. As I harvested the plants, I could imagine a group of young students eagerly awaiting their turn to harvest their crops.

(Above: Before harvesting)

(Above: Harvesting)

(Above: [Left] Sunflowers; [Right] Hybrid Popcorn)


Tonight I'll try the microgreens in a salad. I'm a little nervous about trying the microgreens since the sunflowers look similar to clovers and the hybrid popcorns bare a strong resemblance to grass clippings. As I write this, though, I can hear my parents’ oft-repeated phrase while I was growing up: "If you haven't tried it, you can't say you don't like it."


(Above: Close up of Sunflowers)

(Above: Close up of Hybrid Popcorn)

So I guess it's a hybrid popcorn and sunflower salad for me tonight!

Friday, November 6, 2009

Day 9 of the Microfarm

The microfarm continues to do well. The beets are not nearly as full as the other microgreens. I hope that I planted enough seeds and planted them deep enough into the potting medium.

Check out these updated photos:


Next week I'm hoping to actually sample some of the microgreens. I am told that the tops of the carrots taste just like regular carrots. Stay tuned!

Wednesday, November 4, 2009

Day 7 of the Microfarm

And on the 7th day we had carrots!

It's hard to believe that just a week ago I planted the microfarm and now all of my microgreens have started sprouting.

The carrots were the last to sprout but they are working hard to make up for lost time.

Check out these photos:


(Close up of the carrots)


Yesterday I watered the beets, sunflowers and popcorn since the lids were removed and the potting medium started to dry out.

After removing the lid from the carrots, I will keep my eye on them and probably water the tray in the next few days.

Below, check out a few pictures of the entire microfarm.


More photos to come as the microfarm continues to grow. Plus find out what we do with our microgreens once they are ready to eat!

Monday, November 2, 2009

Day 5 of the Microfarm

When I left work on Friday, I did not anticipate much change to take place in my microfarm over the weekend.

Boy was I wrong!

When I checked the microfarm today, I was shocked by the amount of growth that occurred.

The sunflowers and hybrid popcorn had the most dramatic progress. I removed the plastic lids from the sunflower and hybrid popcorn trays since they have started to grow. [You typically remove the lids when about half the tray is filled with growth.]


(Sunflower shoots. If you look closely, you can see the shell of the sunflower seeds still attached to some of the spouts.)


(Hybrid popcorn starting to grow. It is almost as tall as the plastic cover.)


Meanwhile, the beets are starting to make some nice progress. I removed the plastic lid from the beets since there is too much moisture, which is starting to produce some "fuzzy" plants.


(If you look closely, you can see the start of some potential fungal problems in the beet tray.)


The carrots will take a little longer to grow. Small green shoots have started to sprout up but not enough to warrant removing the plastic cover.


(Tiny carrot sprouts starting to grow.)


I am amazed at how quickly plants grow in the microfarm. It is definitely something that will capture the interest of children, who might normally be impatient when growing a traditional outdoor garden.

Over the next few days, I will continue to monitor the microfarm’s progress. I will need to water the trays without the plastic lids a couple of times throughout the week since they no longer have anything to capture moisture. The humidity within the building will dictate how often the plants must be watered.

Stay tuned! More pictures to come later this week!

Friday, October 30, 2009

Day 2 of the Microfarm

Yesterday, I planted seeds in my microfarm. Not that I was honestly expected the plants to shoot up over night, it is still fun to check the progress of my handiwork.

The pictures below show the condensation that is starting to form on the plastic trays, which indicates that they have enough water.

Stay tuned for the progress of the microfarm as I anxiously wait for my microgreens to start sprouting!

Thursday, October 29, 2009

Little Cost--Big Impact!

The blogger of ObamaFoodOrama just announced (via Twitter) that the official start up cost of the White House Garden was less than $200. It is broken down as $120 for soil amendments $55 seeds/starts, labor "free."

Wow!

For less than $200, the White House started a garden that has given momentum to the school gardening craze and produced hundreds of pounds of fresh produce.

Therefore, teachers/childcare providers, if you are concerned about the cost associated with starting a garden, remember it doesn't have to cost a lot. It also doesn't have to be a huge garden. All that matters is that you are gardening! And, most importantly, you make a profound impact in the lives of children!

Planting a Microfarm!

Today, I planted my very first microfarm!

What's a microfarm, you ask?
A microfarm is essentially a garden on a wagon. Trays of microgreens are planted and placed on the wagon, which has a lights to help the plants grow indoors.

Microfarms offer a solution to Wisconsin's short growing season and provide flexibility for teachers. Teachers are not limited by unpredictable weather. Instead they can decide when they want to plant the microgreens and create an entire gardening unit. Plus, the microgreens start to grow relatively quickly, which will help keep the interest of students.

Planting a microfarm is surprisingly easy.

Granted, when I planted by my mircofarm, the actual cart was already built. But the planting took no time at all.

First, I gathered all of my tools (seen in the picture below).

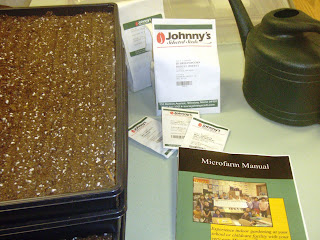
(From the left: Trays filled with soilless potting medium, seeds, microfarm manual, and watering can)

The trays I used came with soilless potting medium already in it, which helped reduce the mess.

Once I scattered the seeds over the potting medium, I was concerned about covering them. I had a feeling I was about to make a huge mess and potting medium and seeds would be everywhere.

Here's an insiders tip: Use a pencil to help till the potting medium and to cover the seeds. Simply put a pencil into the medium and move it back and forth. It will help cover the seeds without making a mess. It is also something easy for kids to do!

I did this with four types of seeds, making a tray for each one.--See picture below


Don't forget to label your trays so you remember what you are actually growing in each tray.

Next I watered my trays of microgreens. I wasn't quite sure how much water to add since the potting medium seemed to soak it up relatively quickly. But I applied enough water to make it moist.

Then, I placed the trays onto the microfarm and covered them with plastic domes. The domes help to keep the moisture in so that you don't have to water the plants very often. Moisture will start to gather on the plastic domes, which indicates that I gave my microgreens enough water. The domes will stay on until the microgreens begin to grow.

Finally, I set the timer for the grow lights to be on for 16 hours and off for 8 hours.

Check out the finished product!


Now, its time to sit back and wait for my microgreens to start to sprout up.

I'll hopefully be able to report my success within a few days!
If you want to learn more, visit http://www.gotdirtwisconsin.org/ for a microfarm manual.

Wednesday, October 28, 2009

Grant: NGA and Home Depot Grant Deadline Approaching

Don't forget that the deadline for the National Garden Association and The Home Depot's 2010 Youth Garden Grants Program is on Monday, November 2.

Visit KidsGardening's website for application details. You have a chance to win $1000 for your youth/school!

Monday, October 26, 2009

Garden Curriculum: More than math and science

When teachers consider starting a school garden, they typically first think of ways to apply it to math and science curriculum. However, gardens offer a fun and creative addition to language arts and writing skills as well.

When you begin a school garden, have students start a garden journal. You can set aside time each week for students to observe and record what they see. They can also draw pictures of their garden in the journal as a way to keep track of the progress of their plants.

Consider have students incorporate gardening related vocabulary in their journals, which will allow them to practice spelling garden related words and using them in sentences.

Or, if you would like your students to put on their creative thinking hats, have them write a story from the perspective of something in the garden. It could told from the perspective of a plant by describing all of the changes it has undergone from first being planted as a seed to growing big and tall. Or a story could be written from the perspective of an insect in the garden. The options are really endless and they give kids a chance to explore and think about their gardens from a different point of view.

Do you have other suggestions for ways a garden can help students develop their language arts and writing skills? Share them in the comments section!

Thursday, October 22, 2009

Resource: School Garden Planning Guide

School Garden Wizard is a wonderful website that provides a step-by-step guide to planning a school garden.

There are so many great tips and tidbits on this site that it is hard to do it justice here. The site has everything from the planning process, to incorporating it into the curriculum, and how to maintain your garden and get the community engaged.

Of particular interest to those who are having a hard time getting "buy in" for the school garden, the website offers a guide to making the case for the garden, how gardening relates to National Science Standards, and a worksheet for drafting a proposal!

This website is a definite must read for teachers interested in starting a school garden!

Tuesday, October 20, 2009

Grant: UnitedHealth HEROES Service-Learning Grants--Deadline Oct. 22

YSA (Youth Service America) is offering a UnitedHealth HEROES Grant. The deadline is this week so if you are interested in attending, you should do so soon! With permission from YSA's staff, you might be able to get the deadline extended if you are interested in applying.

Educators, service learning coordinators and students in health professions are eligible to apply. As stated on YSA's website,
Grant recipients will receive up to $1,000 in support for service-learning projects that focus on childhood obesity, engage youth ages 5-25 in the planning and implementation process, and take place during Semester of Service 2010 (MLK Day, January 18, to Global Youth Service Day, April 23-25).

The website features an easy eligibility quiz that helps you determine whether or not you are qualified for the grant.

Starting a school garden would be a great use of the UnitedHealth HEROES Service Learning Grant. Gardens help fight obesity because they increase children's knowledge and consumption of fresh fruits and vegetables. Moreover, gardening is an excellent form of physical activity. As the grant description states, it would also be an awesome opportunity to have your students assist in the planning of the garden to have a truly hands-on experience and take some ownership and responsibility for their garden.

According to the requirements, you simply need to plan on starting your project during Semester of Service 2010 (MLK Day, January 18, to Global Youth Service Day, April 23-25). A service learning event must also take place on Global Youth Service Day--perhaps either planting the seeds in your garden or harvesting the produce from your container garden, cold frame and/or microfarm and making a meal or donating it to a local food pantry.

If you are trying to figure out how to fund your school garden, consider applying for the UnitedHealth HEROES Service Learning Grant.

Visit YSA's website for more information and apply TODAY!

Friday, October 16, 2009

Resource: Children's Books about Food

The blog Obama Foodorama follows current efforts in food and agriculture policy in Washington.

A recent post, of interest to teachers, is entitled "'Where the Wild Things Are' Joins Another Foodcentric Children's Book on the Official Obama Reading List"

In the post, the blogger highlights children's books that reference food. It includes descriptions of
  • Duck for President
  • The Curious Garden
  • If You Give a Mouse a Cookie
  • Six-Dinner Sid
  • Stone Soup
  • Alexander and the Terrible, Horrible, No Good, Very Bad Day
  • The Lorax
  • The Giving Tree
  • I'm Gonna Like Me

Each of these stories offers important lessons about food, farming, gardening, etc. and would be a great resource or story to read to your class.

Wednesday, October 14, 2009

Resource: Early Sprouts Gardening Project

The Early Spouts Gardening Project is a program in New Hampshire that is similar to Got Dirt? in Wisconsin.

Early Sprouts has a curriculum set up to encourage preschoolers to try new fruits and vegetables. After planting a garden, the Early Sprouts curriculum first has children explore their vegetables with their five senses. Children are encouraged to smell, taste, touch, listen and look at the chosen vegetable for the week.

Next, the class cooks a recipe together using that vegetable.

Finally, at the end of the week, the teachers send children home with their "Family Recipe Kits," which contain the recipe and ingredients to make the same snack that the children made in the class earlier in the week.

The Early Sprouts website provides more detailed instructions about its program, including guidelines for teachers and sample recipes.

The curriculum discussed appears to provide a consistent method for allowing children to interact with and try new vegetables. It also allows children to connect classroom activities with their home lives.

Check out the Early Sprouts website for an interesting approach to incorporating your school garden into your classroom and the homes of your students.

Friday, October 9, 2009

Activity: Stone Soup

A classic childhood fable is the story of Stone Soup. (A version of the story can be found here and your local library should also have a copy of the book).

In the story, a weary traveler makes stone soup. He simply puts a stone in a pot of boiling water and with the generosity of others, he creates a tasty meal.

This story provides the perfect opportunity to teach children about the value of sharing and teamwork.

A variety of activities can be used in conjunction with this story.
  • Have students identify the vegetables mentioned in the story
  • Make your own stone soup with vegetables from your garden. (Here is one soup recipe, but any vegetable soup recipe will work just as well). Have students pick fresh vegetables from the garden, having each child contribute one to the soup
  • If your school does not have a garden, ask students to bring in food from home to be added to the soup
  • Explain that stone soup can only be made with everyone's help. In the same way, a school garden can only succeed when everyone contributes their own special talents by caring for the garden

Enjoy your Stone Soup! Just don't forget to remove the stone before you start eating!

Wednesday, October 7, 2009

Spooner School District Garden

In an effort to try to find all of the Got Dirt? Gardens in Wisconsin, I have exchanged emails with Diann Parker of Spooner Elementary.

Spooner School District has been gardening for three years now. Diann directed me to her blog www.helpinghandsgarden.blogspot.com, which is a history of their garden.

Check it out!

It shows an actual school garden in action. The blog highlights the steps taken to start the garden and how the school district uses the produce from the garden. There are plenty of pictures showing the garden's progress.

It's inspirational to see a school garden in action and learn how one school district is incorporating it into the curriculum and meals for the students.

Monday, October 5, 2009

Activity: Gardener Interview

Interviewing a local gardener provides a great opportunity for children to learn gardening tips and to recognize that their school garden is one of many gardens in the community.

The follow activity outlines the steps for conducting a gardener interview with your students. The goals of this activity are for students to learn how to ask good questions and conduct an interview, practice listening skills, synthesize information, create stories or draw pictures, and learn about local gardening techniques.

Materials:
Local gardener to be interviewed
Pens/Pencils
Paper

Activity:
  1. Contact a local gardener and invite him/her to come to your class. Consider contacting a parent, community member or local master gardener volunteer.
    Make sure that whomever you contact is comfortable speaking in front of your class.
  2. Discuss interviewing techniques with your students. Make sure they understand how to ask good questions and use good listening skills.
    If necessary, break students into pairs to practice interviewing and listening. Have them interview each other and present what they heard.
  3. Brainstorm interview questions to ask the gardener.
    Examples:
    When did you begin gardening?
    What types of fruits/vegetables do you plant?
    How do you use the plants?
    What tips/suggestions do you have for our garden?
  4. Have students write down the questions they will ask the gardener.
  5. Confirm the date/time of the interview with the gardener.
  6. On the day of the interview, ask a student to introduce the class.
  7. Either ask the gardener to describe their gardening experience or have students begin asking questions.
  8. If you already have a school garden, show it to your guest.
  9. Thank the gardener for coming to the class.
  10. After the interview, discuss with the class what they learned.
  11. Have students either write a story about the interview or draw a picture.
  12. Send a thank you note to the gardener.

Inviting a gardener to come to your classroom allows students to realize that they are part of a larger gardening community. It can be conducted before students start a garden or once they have begun gardening. Either way, it should allow for great gardening stories to be shared!

Work Cited:

Activity adapted from Krasny, M. (2005, June). Garden Mosaics Program Manual. Cornell University.

Tuesday, September 29, 2009

Activity: Exploring the Four Seasons

As fall begins, now would be a great time to talk about the seasons with your students and to explain what happens in the garden in each season.


Materials:
Construction Paper
Markers/crayons

Activity:

  • Ask students to name the four seasons. (Write them on the board).
  • Ask questions about each of the seasons:
    What is the weather like in the winter/spring/summer/fall?
    Can you name some activities we do in the winter/springs/summer/fall?
    What do you usually wear in the winter/spring/summer/fall?
  • Explain that just as we do different activities and wear different clothes for each season, the garden is also different in each season. In particular, the weather also plays an important role for each season in the garden.
  • Ask students how the garden changes with each season.

    In the spring, we prepare our garden and plant seeds. The rain helps to water our seeds so that they can grow.

    In the summer, the sun helps our plants continue to grow big and tall.

    In the fall, our plants are ready to be harvested. We get to pick them and enjoy eating them. The weather starts getting colder in the fall and we have to prepare our garden for next year.

    In the winter, it is too cold for most of our plants to grow outside. It snows in the winter and covers up our garden.


  • Give each student a piece of paper and ask them to draw a picture of each season. Have students include different activities that occur in each season and/or draw what the garden looks like in each season.
  • Have students share their completed drawings.

Work Cited
Activity adapted from “Me and the Seasons” in Jaffe, R. & Appel, G. (2007). The Growing Classroom: Garden-based science. National Gardening Association: South Burlington, VT.

Friday, September 25, 2009

Activity: Carrot Necklaces

Materials:
  • Carrots
  • Heavey thread
  • Darning needle
  • Knife
Activity:
  1. Wash the carrots and cut them into slices about 1/4 inch thick
  2. Thread your needle. The thread should be long enough to go around someone's head, plus a little extra.
  3. Push the carrot slices onto the thread by pushing the needle into the center of each slice.
  4. Once completed, lay your necklace on a piece of paper in a dark place to dry, making sure none of the carrots touch each other. As the carrots harden and dry, they turn into wrinkled beads. The dryin process takes about a week.
Work Cited:
Ocone, L with Pranis, E. (1983). The National Gardening Association Guide to Kids' Gardening: A complete guide for teachers, parents, and youth leaders. Wiley Science Editions: New York.

Stay connected with other Got Dirt? Gardens

Did you know that there are several easy ways for you to stay connected with other teachers, educators, and childcare providers who have started gardens?

Besides this blog, you can stay connected with us and other gardeners through

You can always check out our website for helpful resources and manuals.

We are also putting together an interactive map showing all of the Got Dirt? Gardens in Wisconsin. If you haven't already, send in a profile with information about your garden so we can add you to our map!

We hope you stay in touch and share your gardening experiences!

Wednesday, September 23, 2009

Grant: National Gardening Association and Home Depot

Teachers and childcare providers interested in finding funding for their school gardens should consider applying for the National Gardening Association and Home Depot's 2010 Youth Garden Grants Program.

According to NGA's website, gardens should emphasize one or more of the following:
  • educational focus or curricular/program integration
  • nutrition or plant-to-food connections
  • environmental awareness/education
  • entrepreneurship
  • social aspects of gardening such as leadership development, team building, community support or service learning.

Applicants should plan to garden with at least 15 children ages 3-18 years old.

NGA and Home Depot will distribute 100 grants. Five grants will value $1000 and 95 grants will value $500.

The deadline for the grants is November 2, 2009. Winners will be announced in Februrary 2010.

For more information about this particular grant, visit http://www.kidsgardening.org/YGG.asp

For additional grant opportunities, visit the Funding and Grant section at www.gotdirtwisconsin.org

Tuesday, September 22, 2009

Secrets to Gardening with Children

    Below is a list of tips and suggestions for gardening with children. This list is taken from D. Landreth Seed Co.
    Visit their website for more information, including types of seeds and plants that work well for children's gardens.

  1. Always have something happening in the garden. Start with radishes and end with pumpkins.

  2. Choose easy to grow vegetables and flowers. Nothing succeeds like success.

  3. Choose each variety because there is something interesting about it, i.e. unusual size, unusual color, unusual shape.

  4. Choose vegetables and flowers with a story.

  5. Try not to plant mixes of colors. Groupings of specific colors are visually more intriguing to children.

  6. Tend the garden on a schedule, for example, every Saturday morning, every Sunday afternoon, or each Wednesday at 4: 00 PM.

  7. Teach children to weed by making weeding a fun game.

  8. Always let children do the watering--they love playing with the hose.

  9. Teach children proper garden preparation in the spring.

  10. Teach children to clean up the garden in the fall and use this as a time to plant flower bulbs and garlic and onion sets.

Copyright 2008 by The D. Landreth Seed Co., 60 East High Street, New Freedom, PA 17349, 800-654-2407. http://www.landrethseeds.com/.

Friday, September 18, 2009

Activity: Shape Hunt

Description: Allow children to search in the garden and identify shapes.

Ages: 5-8

Materials:
Journals/Paper
Pencils/Crayons
Sheet containing drawings and names of geometric shapes.

Activity: Take your class on a "shape hunt" to identify shapes in the garden.

First ask children to name the types of shapes that they already know. Discuss the prepared sheet by identifying and naming the example drawings and names of geometric shapes.

Demonstrate how to look at plants, leaves, etc. to identify shapes. Tell the children that they will now hunt for shapes in the garden.

Tell each child or each pair of children to look in the garden and identify and draw at least six shapes.

Upon completing their hunt, gather again to discuss what types of shapes they discovered and where they found them. Compare all the different ways that similar shapes are found in the garden.

Depending on available time, have children go on a second hunt to find shapes that were not found the first time.

Work Cited:
White, J., Barrett, K.D., Kopp, J., Manoux, C., Johnson, K. & McCullough, Y. (2006) Math in the Garden: Hands on activities that bring math to life. National Gardening Association: Burlington, Vermont.

Thursday, September 17, 2009

Welcome!

The goal of the Got Dirt? Gardening Initiative is to help teachers and childcare providers create gardens in their educational facilities. Involving children in the gardening process creates an active-learning environment. Moreover, by encouraging children to try the fruits of their labor, a garden can increase children's consumption and exposure to fresh fruits and vegetables.

The Got Dirt? Gardening Initiative features classes for educators to teach them about the process of starting a garden.

This blog will serve as a resource for Got Dirt? Gardeners and individuals interested in starting their own school garden. In particular, it will feature activities, tips, lesson ideas, and suggestions for ways to integrate a school garden into student's curriculum.

I hope that you enjoy this blog and find its contents valuable. If you would like to contribute to this blog or if you have suggestions, please let me know!