What's a microfarm, you ask?
A microfarm is essentially a garden on a wagon. Trays of microgreens are planted and placed on the wagon, which has a lights to help the plants grow indoors.
Microfarms offer a solution to Wisconsin's short growing season and provide flexibility for teachers. Teachers are not limited by unpredictable weather. Instead they can decide when they want to plant the microgreens and create an entire gardening unit. Plus, the microgreens start to grow relatively quickly, which will help keep the interest of students.
Planting a microfarm is surprisingly easy.
Granted, when I planted by my mircofarm, the actual cart was already built. But the planting took no time at all.
First, I gathered all of my tools (seen in the picture below).
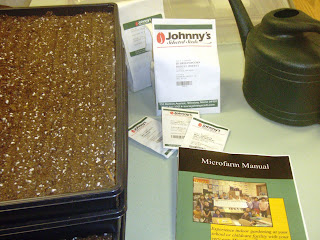 (From the left: Trays filled with soilless potting medium, seeds, microfarm manual, and watering can)
The trays I used came with soilless potting medium already in it, which helped reduce the mess.
Once I scattered the seeds over the potting medium, I was concerned about covering them. I had a feeling I was about to make a huge mess and potting medium and seeds would be everywhere.
Here's an insiders tip: Use a pencil to help till the potting medium and to cover the seeds. Simply put a pencil into the medium and move it back and forth. It will help cover the seeds without making a mess. It is also something easy for kids to do!
I did this with four types of seeds, making a tray for each one.--See picture below

Don't forget to label your trays so you remember what you are actually growing in each tray.
Next I watered my trays of microgreens. I wasn't quite sure how much water to add since the potting medium seemed to soak it up relatively quickly. But I applied enough water to make it moist.
Then, I placed the trays onto the microfarm and covered them with plastic domes. The domes help to keep the moisture in so that you don't have to water the plants very often. Moisture will start to gather on the plastic domes, which indicates that I gave my microgreens enough water. The domes will stay on until the microgreens begin to grow.
Finally, I set the timer for the grow lights to be on for 16 hours and off for 8 hours.
Check out the finished product!


Now, its time to sit back and wait for my microgreens to start to sprout up.
I'll hopefully be able to report my success within a few days!
If you want to learn more, visit http://www.gotdirtwisconsin.org/ for a microfarm manual.


Hello-Would you please tell me how you made the roof for your microform? I would like to build one for my class. I really would like the instructions for the roof.
ReplyDeleteThanks