Tuesday, November 24, 2009

Activity: Estimating Tomato Seeds

Fresh fruits and vegetables can be excellent tools to teach basic math skills. In this activity, students will practice estimating, comparing and contrasting, and doing basic addition and subtraction.

Materials:

Cherry tomatoes (enough so each student gets ½ of a tomato)
Paper towels/napkins
Paper and pencils
One large tomato
A knife to cut food in half ahead of time

Activity:

  1. Explain to the students that today we are going to guess or estimate the number of seeds inside of a fruit or vegetable.

  2. Hand out ½ of a cherry tomato and paper towel/napkin to each student. Make sure that the students do not eat the tomato before completing the exercise.*

  3. Without actually counting the number of seeds, have students guess how many seeds are in their tomato half. Have them record the number on a piece of paper.
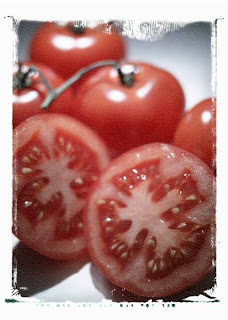
  4. Instruct students to count the seeds in their tomato.

  5. Have students record the actual number and figure out how close they were to their guess, allowing them to practice subtraction. Find out who was the closest.

  6. Have students compare the number of seeds in their tomato with a partner. Who has more seeds? How many seeds do they have all together?

  7. As a class, calculate the total number of seeds from all of the tomato halves. You can also calculate how many seeds one half of the room has compared to the other, how many seeds the girls had compared to the boys, etc. Each time students can either calculate the totals together as a class or do the addition on their own and then together as a class.

  8. Now ask students to guess how many seeds are in one large tomato. Record answers on the board or chart paper.

  9. Have students count the number of seeds in the tomato.

  10. Compare the number of seeds in the large tomato to the number of seeds in the cherry tomato halves and to the classes’ total number of cherry tomato seeds. Which has more?

Extension:

  • Do the same activity with a different fruit/vegetable (ex: pumpkins, apples, peppers, watermelon, etc.)

  • Have students calculate the mean (average), median (middle number), and mode (most frequent number) for the classes’ cherry tomato seeds
Note: Although student could eat their tomato halves, they probably shouldn’t since they will be playing with them and counting the number of seeds. It is probably best to advise your students that although tomatoes are a yummy snack, it is best that we don’t eat them after playing with them.

Monday, November 16, 2009

Grant Opportunity: Welch's Harvest Grant

Welch's and Scholastic will award two schools in every state with a customized indoor or outdoor garden package to teach children about nutrition and sustainable agriculture.

The awards are open to K-8 classrooms with a minimum of 15 students. The top five winners will receive a package valued at $1,000, the top 25 winners will receive a package valued at $500, and 70 winners will receive a package valued at $250. According to Welch's website, the award package includes garden tools, seeds and educational materials.

Remember that the White House's garden cost less than $200 to create. So no matter what, if you receive an award, you'll have enough to start a garden!

Applications must be submitted by February 6, 2010. Visit Welch's website for an application and additional information.

Friday, November 13, 2009

Students Write about their Microfarm

Students from Woodland Elementary School in Barron, WI have also been busy planting and harvesting a microfarm. Check out these adorable letters from the students describing their experiences.

Dear Mr. Wright,
Our class Micro Farm went great. We all loved watching
it grow. When they were finished growing, we got to eat them. My
favorite ones were the purple kohlrabis and the carrots. The one I did not like was the sunflowers. I got to plant the purple kohlrabis. I loved planting the purple kohlrabis. Thank you for inventing the Micro Farm.
Love,
Mackenzie


Dear Mr. Wright,
My class Micro Farm is going very well. We are harvesting around Oct. 21. We have purple kohlrabi, tenber green mustard, carrots, and sunflowers. One of the carrots was a foot taller then the other. The carrots were the last ones starting to grow. I can not wait until we harvest them. Thank you for giving us the farm.
Your friend,
Grace


Dear Mr. Wright,
Thank you for the micro-farm. It was fun watching the plant’s grow. My favorite was the purple kohlrabi. The sunflowers tasted funny. The tendergreen mustard and carrots tasted funny. It was fun to harvest the greens. I planted the sunflower. I planted the sunflowers with Walter and Kambria. We had it with ranch dressing.
Your friend,
Kiara

Tuesday, November 10, 2009

Sampling the first microfarm harvest

Last night, I tried the first of the microgreens from the microfarm.

I decided to first taste each microgreen individually, which I am told is similar to how teachers have their students sample the microgreens. Plus, I figured that before I took a leap of faith and incorporated them into a salad, I would first see how they tasted by themselves.

Again, I must admit, I was nervous about trying the microgreens. They bear a strong resemblance to grass clippings. Plus, I've never considered eating sunflowers or hybrid popcorn before, so I was completely clueless how there would taste.

First up: Sunflowers. After a slight hesitation, down the hatch it went. I was pleasantly surprised. The sunflowers tasted similar to other salad greens and reminded me of something I might get in a restaurant.

Not too bad!

Next up: Hybrid popcorn. I must admit, I did not like the hybrid popcorn as much as the sunflowers. I thought that something about the texture and almost chewiness of the hybrid popcorn was not appealing. However, that does not mean I will totally give up on it. I plan on incorporating them into a salad. Although I may not like how they taste on their own, they may work well when mixed in a salad with other greens.

So my microfarm journey continues. I'm looking forward to harvesting the carrots since I am told the greens taste just like regular carrots!

Monday, November 9, 2009

The first harvest from the microfarm

After planting my first microfarm less than two weeks ago, it is time to start harvesting!

The sunflowers and hybrid popcorn were the first microgreens harvested.

Harvesting was incredibly easy and a lot of fun. It was like giving my microgreens a haircut. Using a pair of scissors, I trimmed the tops of the plants, leaving a small shoot behind. As I harvested the plants, I could imagine a group of young students eagerly awaiting their turn to harvest their crops.

(Above: Before harvesting)

(Above: Harvesting)

(Above: [Left] Sunflowers; [Right] Hybrid Popcorn)


Tonight I'll try the microgreens in a salad. I'm a little nervous about trying the microgreens since the sunflowers look similar to clovers and the hybrid popcorns bare a strong resemblance to grass clippings. As I write this, though, I can hear my parents’ oft-repeated phrase while I was growing up: "If you haven't tried it, you can't say you don't like it."


(Above: Close up of Sunflowers)

(Above: Close up of Hybrid Popcorn)

So I guess it's a hybrid popcorn and sunflower salad for me tonight!

Friday, November 6, 2009

Day 9 of the Microfarm

The microfarm continues to do well. The beets are not nearly as full as the other microgreens. I hope that I planted enough seeds and planted them deep enough into the potting medium.

Check out these updated photos:


Next week I'm hoping to actually sample some of the microgreens. I am told that the tops of the carrots taste just like regular carrots. Stay tuned!

Wednesday, November 4, 2009

Day 7 of the Microfarm

And on the 7th day we had carrots!

It's hard to believe that just a week ago I planted the microfarm and now all of my microgreens have started sprouting.

The carrots were the last to sprout but they are working hard to make up for lost time.

Check out these photos:


(Close up of the carrots)


Yesterday I watered the beets, sunflowers and popcorn since the lids were removed and the potting medium started to dry out.

After removing the lid from the carrots, I will keep my eye on them and probably water the tray in the next few days.

Below, check out a few pictures of the entire microfarm.


More photos to come as the microfarm continues to grow. Plus find out what we do with our microgreens once they are ready to eat!

Monday, November 2, 2009

Day 5 of the Microfarm

When I left work on Friday, I did not anticipate much change to take place in my microfarm over the weekend.

Boy was I wrong!

When I checked the microfarm today, I was shocked by the amount of growth that occurred.

The sunflowers and hybrid popcorn had the most dramatic progress. I removed the plastic lids from the sunflower and hybrid popcorn trays since they have started to grow. [You typically remove the lids when about half the tray is filled with growth.]


(Sunflower shoots. If you look closely, you can see the shell of the sunflower seeds still attached to some of the spouts.)


(Hybrid popcorn starting to grow. It is almost as tall as the plastic cover.)


Meanwhile, the beets are starting to make some nice progress. I removed the plastic lid from the beets since there is too much moisture, which is starting to produce some "fuzzy" plants.


(If you look closely, you can see the start of some potential fungal problems in the beet tray.)


The carrots will take a little longer to grow. Small green shoots have started to sprout up but not enough to warrant removing the plastic cover.


(Tiny carrot sprouts starting to grow.)


I am amazed at how quickly plants grow in the microfarm. It is definitely something that will capture the interest of children, who might normally be impatient when growing a traditional outdoor garden.

Over the next few days, I will continue to monitor the microfarm’s progress. I will need to water the trays without the plastic lids a couple of times throughout the week since they no longer have anything to capture moisture. The humidity within the building will dictate how often the plants must be watered.

Stay tuned! More pictures to come later this week!